7 Different Types of T-Shirt Printing Methods: Which Do You Think is The Most Efficient?
When you think about t-shirt printing, probably the first that thing that plays in your mind is using the traditional nylon mesh screens to transfer your desired design or artwork onto the t-shirt surface.
But that is just one method of t-shirt printing and there are many other alternative ways of doing it, some of which are even faster, more versatile, and cost-effective.
In this article, we’ll explore up to 7 different types of t-shirt printing methods and how they work, their good and bad sides, and who can you use them.
1. Screen Printing
Also known as silk printing, screen printing is one of the most popular t-shirt printing methods used today.
Essentially a manual printing method, screen printing gets its name from the way it’s carried out; it involves the use of screens to transfer designs to garments.
This method has been around for ages and is even regarded as an old school by some folks. This is probably due to the use of items such as a squeegee which is a true throwback.
Nevertheless, the method still delivers awesome results which explain why its popularity still soars high up to today.
How it Works:
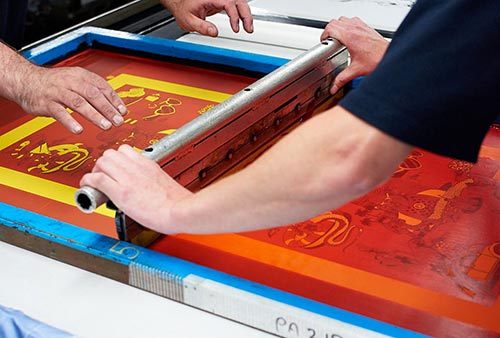
For you to use the screen printing method print on t-shirts, you’ll need a squeegee, a nylon mesh (works as the screen), and a stencil.
The stencil is where you create the design while the other two tools will help with eventually transferring your design to the t-shirt.
You start by creating a stencil of the design your client wants to be transferred to the t-shirt. You can achieve this using an acetate sheet plus emulsion.
This is followed by hardening the stencil in all the areas you don’t want your design to appear. In other words, the hardened parts are the parts that will be left unprinted when you finally transfer your design.
Once you have your design ready on the stencil, the next step is to place it on top of the mesh screen with the fabric to be printed on right underneath it (the screen). Make sure everything is FLAT for the best printing results.
Next, add ink to the sandwich made by the nylon mesh screen and stencil.
Grab your squeegee and use it to pull the ink across the entire screen. This will help you push ink through the stencil and print it onto the fabric lying below, where the stencil gaps are.
Pros of Screen Printing:
- Durable prints: one of the things you’ll like about screen printing is that it produces exceptionally durable, long-lasting designs onto your tees compared to other popular methods like heat press or digital design. The thick layers of ink you lay down on the screen get absorbed by the fabric material to create prints with superior durability.
- Detailed prints: another reason to use the screen printing method is that it produces high-quality image transfers. It offers you impressive and brilliant designs with crisp and sharp edges.
- Cost-effective for high volume prints: one of the good things about screen printing is that it will save you a great deal of cash when you have multiple fabrics to print a design on. This is because you’ll only need to set your screen printing once and use it on different fabrics with stunning image reproduction.
- Fast results for single design: you can rely on the screen printing method as a fast method for transferring simple designs or texts. This makes it ideal for printing artwork with solid design e.g. company names, logos, graphics, and so on.
Cons of Screen Printing:
- Time-consuming: The whole method will take more of your time compared to the digital printing methods available today. Remember that for each color or shape in your design, you’ll need to prepare a new screen which can be time-consuming, especially if you have multiple garments to print on that require different designs or complicated designs.
- Limited colors: If you’re planning to transfer a design bearing a wide range of colors, then the screen printing method might not be for you. One major downside of this method is that it can only print color at a time. Printing multiple colors with multiple layers will most likely result in alignment issues. Avoid using this method for photography-based prints and stick to simple designs.
- Takes time to master: this method isn’t that easy. If you’re an absolute beginner, there’s a learning curve to follow to master this art and start producing screen-prints.
Who is it For?
As we have said above, screen printing is only practical for high-volume printing of t-shirts. This is to say it is a great printing method for businesspeople who usually receive bulk printing orders.
It lets you use the stencil on multiple designs to help save setup time and cost—which are crucial for any business! Moreover, it delivers brilliant, high-quality designs just as your clients expect.
It is also ideal for printing simple designs as you can use one screen for multiple shirts. If working on photography-based or other complex designs, steer away from screen-printing. You may buy a screen printing machine for the job done
2. Direct To Garments (DTG)
The direct to garment (DTG) t-shirt printing technique is a relatively new player in the field. It works just like the inkjet printer does in your home or office, only that in this case it sprays the print ink to a garment and not the paper.
How it Works:
To use DTG, you simply insert the t-shirt you want to print on into the Direct to Garment printer, just as you feed a paper to a printer.
You’ll then need to load the design to be printed into your computer which will then feed them into the printer.
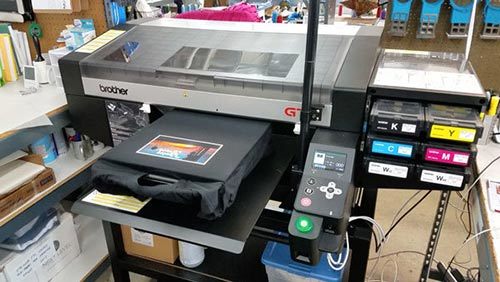
When everything is set, hit the print button and your t-shirt gets sprayed on and soaked with the printing ink to create your desired design.
For you to use this method, however, you’ll need to invest in a printer. And no, it’s not the typical printer, but a DTG printer. You want to make sure you get a high-quality DTG printer as it will affect the quality of your results.
Also worth keeping in mind is that this method might not produce the best result for darker fabrics. The ink used is too thin and won’t look that good on dark shirts.
Pros of DTG:
- High-quality prints: one of the reasons DTG is gaining popularity fast, despite being a relatively new technique, is its ability to produce full-color and bright designs on your garments.
- Works with a wide selection of colors: unlike screen printing which doesn’t do well for detailed designs with multiple colors, DTG supports a wide selection of colors. And this makes it perform exceptionally well for multi-color or photography-based designs.
- Favors small batch printing: DTG presents itself as the perfect method for printing small methods. you’ll be simply turning the garments through the DTG printer like pieces of paper, eliminating the setup cost per print as seen in other printing methods.
Cons of DTG:
- Material compatibility: the method is designed to work with cotton t-shirts. If you use it on t-shirts made with 90% polyester and other materials, you won’t get those mind-blowing printing results as you’d with cotton shirts.
- Time-consuming: completing a single design transfer will take several minutes. You’d want to lean on a different technique if you usually do large printing runs to help you save as much time as possible.
- Costly method: DTG printer which is needed for this method to work will set you back approx. $5,000 for a decent model and the high-end models can go as high as $50,000! If you’re just starting and don’t have this kind of budget, this might not be the method for you.
Who is it for?
Anyone who usually receives small orders of t-shirts to print and fill-in orders will be well satisfied with the direct-to-garment printing method. Businesses people who heavily rely on screen printing can incorporate DTG as an additional method for handling small designs and those complex design orders that are a bit challenging for the screen printing method.
3. Dye Sublimation
Dye sublimation, or you can simply call it sublimation, is also one of the newest trends in the t-shirt printing industry.
This digital printing method has also gained a lot of popularity as a highly effective method for t-shirt printing.
Sublimation is unlike other methods in that the dye ink gets embedded in your fabric to create a permanent, extremely durable print with a super-smooth texture and an intricate level of detail.
How it Works:
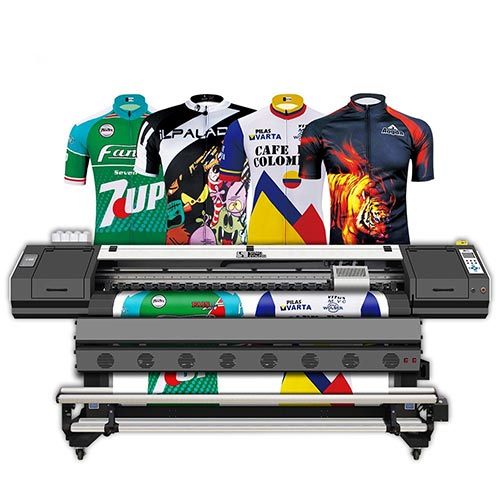
For this method, you start by printing your design on a special transfer paper using the dye-sub inks. Make sure you print the design in mirror image.
The dye-sub sinks are water-based, so they’re more environmental-friendly than those made with harsh chemicals.
Next, line up the transfer with your fabric and use a heat press machine to apply a combination of heat and pressure to help print the design onto the t-shirt.
During the printing, the ink undergoes sublimation (transits from solid to gaseous state) and penetrates into the fibers of the shirt.
The ink turns back to a solid state and gets permanently bonded to the fibers—resulting in a high-definition print with an extremely high level of detail.
Pros of Dye Sublimation:
- Extremely durable prints: this is probably the main reason why sublimation printing is soo popular. The method actually embeds the sublimation ink into the fibers of the t-shirt you’re working on where they permanently bond to create a long-lasting print that doesn’t fade, peel, or crack no matter how many times you wash it.
- Huge selection of colors: unlike screen printing, sublimation will not limit you when it comes to the number of colors you can use for printing. It supports a huge selection of colors to allow you to work on just any type of design or artwork, no matter how many colors it carries.
- Produces intricate detail: the method is capable of producing super-vivid, color designs with a high level of detail. This qualifies it as a great method for working on complicated designs.
- Cost- Effective: A simple sublimation printing setup will cost you roughly $500. You just need access to a heat press and a sublimation printer to get your setup running. It’s surprising that a method that produces stunning printing results is so cheap compared to other methods that produce less durable prints.
Cons of Dye Sublimation:
- Works for polyester only: dye sublimation is the exact opposite of the DTG method. While the former works with cotton only, sublimation works best for polyester. A t-shirt must contain 65% polyester for it to work with this method.
- Works better for lighter colored garments: for you to get the best results with dye sublimation, you’d want to use it on light-colored fabrics, e.g. white. However, you can use it on any other type of garment about the print won’t come out as good as it does on a white t-shirt.
- Ideal for small batches only: this method works for smaller batches only.
Who is it For:
If you’re looking for a cost-effective printing method for your t-shirt printing business that produces quality results, then the sublimation technique is for you. If you always find yourself working with polyester t-shirts, you’ll also love this method. And if you usually work with complicated designs, this technique will meet your printing needs and expectations.
4. Heat Press Printing
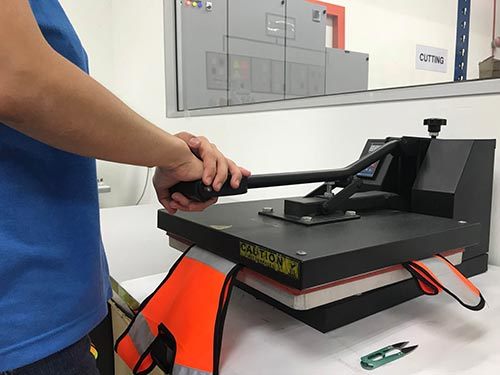
Heat press printing is another popular method for personalizing shirts you’re your preferred designs.
The process involves using a heat press machine that heavily relies on high temperatures and pressure combination to transfer the designs.
It’s similar to sublimation in that it involves printing your design on a special heat transfer paper (HTF) and then transferring the design to your shirt via heat and pressure.
Just like sublimation, a heat press can produce high-quality designs with vivid colors and excellent detail.
How it Works:
The heat press method follows a similar route to the dye sublimation technique.
You start by printing the design you want to transfer on a special heat transfer paper. You can use an inkjet or laser printer for this job.
Load the t-shirt into the press and make sure it sits flat for the best results.
Next, you place the transfer paper on the t-shirt you want to print on, with the design side facing down.
Set the timer as instructed in the transfer paper user guide and press the heat press machine on the t-shirt to start the transfer process.
Peel off the transfer paper while it’s still hot to reveal the print on your t-shirt.
Pros of Heat Press Printing:
- Low startup costs: this method is highly favored for being super-affordable. With just a small amount of $500, you can start printing onto t-shirts. Startups with a small budget tend to use this method for its cost-effectiveness.
- Huge color selection: another thing that makes heat press printing popular is that it doesn’t restrict you on what colors you can use for t-shirt printing. As such, it makes it possible for you to work with all types of designs, including complicated ones such as photographic material.
- Versatility: this method is also extremely versatile when it comes to the type of materials you can use it with. It can work with nearly any type of material as long as you use the correct temperature setting for different materials. The only exception is that it doesn’t work with heat-sensitive t-shirt materials.
- user-friendly: using a heat press machine to transfer your designs to t-shirts is an incredibly simple process and everyone can master it in no time. Unlike screen printing which requires a learning curve, an absolute beginner can get accustomed to heat pressing with just a few trials.
Cons of Heat Press Printing:
- not suitable for high volume orders: the method can be time-consuming right from the prep work to loading the garments to pressing the designs. In other words, it’s quite slow and only ideal for small volume work.
- less durable prints: though an image transferred using a heat press feels durable and looks great when it’s new, the truth is that it can deteriorate pretty fast. It can easily peel and crack with time, and this can get worse with frequent washing. This is one area where heat press parts way with the dye sublimation method!
- not suitable for dark-colored fabrics: if you want to get the best results with heat press printing, try sticking to shirts with light shades.
Who is it For:
This is the best printing method for all your home-based t-shirt printing needs. As we have just mentioned, the startup cost is less and it’s a bit slower, meaning it will work perfectly well for hobbyists who print fewer t-shirts and do it less frequently.
5. Vinyl Cutting
Vinyl printing also goes by the names CAD cut vinyl and computer-aided design cut printing and is another viable t-shirting printing technique.
It involves cutting your design on colored vinyl and then using heat and pressure to stick the design on the surface of your shirt.
Since this technique relies on heat and pressure, it means you’ll need to use an iron box or a heat press for successful vinyl printing.
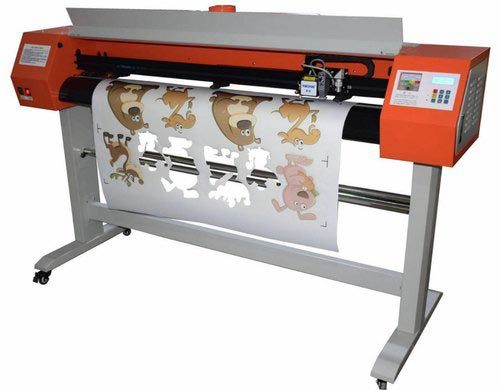
For this method, you’ll need to invest in a vinyl cutting machine—this is the special printer that transfers your design onto the vinyl for easy sticking to the fabric surface.
How it Works:
The process for vinyl printing starts with coming up with the image you wish to transfer to your shirts.
You’ll then need to connect a computer vinyl cutting machine to your computer to help you precisely cut out the design from the vinyl.
Once the machine is done printing the design, weed it out to remove any extra material from the design.
Now put the design on the fabric surface and use a heat press to apply heat and pressure needed to make the design stick onto the t-shirt.
Pros of Vinyl Printing:
- Material compatibility: probably the best thing about vinyl printing is its ability to work with all materials! Yes, you can use this method on pretty much anything, including cotton, polyester, rayon—anything!
- great for mass production: this method also produces fast printing results as the vinyl cutters are super-fast after and the cut vinyl design is fast to transfer the fabric with a simple heat press. This makes vinyl printing suitable for processing high-volume work.
- stunning printing results: using vinyl printing will also enable you to deliver cool designs on your clients’ shirts. In simple words, it creates a 3D image on the shirt with a texture that stands out!
Cons of Vinyl Printing:
- limited choice of colors: the number of colors you can work with here is limited. Remember, the vinyl material comes in only one solid color, making it impossible to transfer multi-color designs via vinyl cutting.
- less durable prints: another downside is that the vinyl can easily crack due to excessive flexing. This will not only feel uncomfortable for the wear but will also affect the image longevity.
- high setup cost: investing in the basic equipment needed for vinyl printing will require you to spend up to $1000. While this isn’t the most expensive startup cost on this list, it’s quite something, especially for beginners.
Who is it For:
Any t-shirt printer who mainly works with basic designs such as business logos or numbering sports jerseys will find vinyl cutting a reliable t-shirt printing method. Since this technique is easy to use and produces fast results, it is a good alternative it is screen printing for business people who usually receive bulk printing orders.
6. Plastisol Transfer
Plastisol transfer method is similar to screen printing in many ways and is sometimes referred to as indirect screen printing.
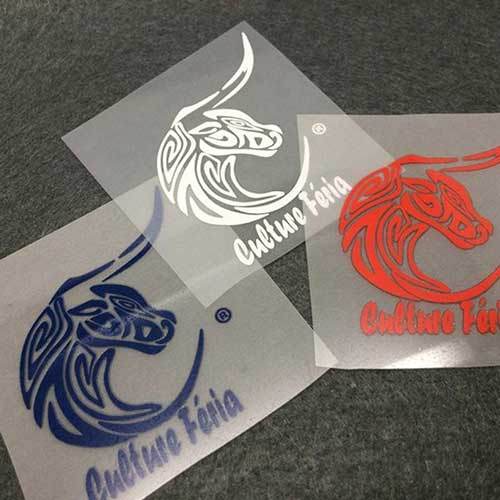
What sets it apart from traditional screen printing is that instead of using the traditional screens, you print your design on a plastisol transfer paper and then use a heat press machine to transfer the design to your t-shirt.
How it Works:
To utilize this printing technique, you first need to get your design printed on a plastisol transfer paper.
We suggest outsourcing the making of the plastisols, especially if you’re just starting out. You just need to send your printer the designs you wish to print onto t-shirts and wait for them to ship the plastisol that’s ready for printing onto the fabric.
Once you have your plastisol ready to use, simply lay it down on the heat transfer paper and put the plastisol transfer paper carrying the design on top (with the printed side down).
The last step is using your heat press machine to apply temperature and pressure to transfer the design. You’ll have two options here—cold transfer or hot-split.
The cold transfer is simpler as you simply press the image for about 12 seconds, open the heat press, and give the ink around 60 seconds to dry. This method will give your print a glossy finish.
The hot-peel option is where you press down the design with your heat press machine for enough amount of time to completely cure the ink. Peel the transfer paper immediately afterward. This method is great if you want your print to have a soft matte finish.
Pros of Plastisol Transfer:
- high durability: plastisol transfers tend to be more durable compared to heat transfers. They retain their amazing appearance wash after wash without signs of fading or cracking overtime.
- works for complicated designs:while a detailed design isn’t easy to replicate using the traditional screen printing method, this is less of an issue when using plastisol transfer as it’s just a matter of printing the design on the special plastisol paper and then using heat to print it on a shirt.
- low startup cost: the key equipment needed here is a heat press machine. You can get a decent model for around 200-300 when you’re just starting out and later upgrade to a higher-end model with better features and performance.
Cons of Plastisol Transfer:
- not ideal for high volume orders: the whole process is quite labor-intensive and you’ll find yourself spending a lot of time and effort printing your shirts. For this reason, this method should be out of your list for handling huge orders.
Who is it For:
Plastisol transfer is a viable option for business people who usually deal with low-volume printing orders and want to give their clients good-quality printing results that are long-lasting. If you’re already using screen printing for your business, you can use this indirect screen printing as a complement to help you easily handle complicated/detailed designs.
7. Inkjet / Laser Iron-on Transfer
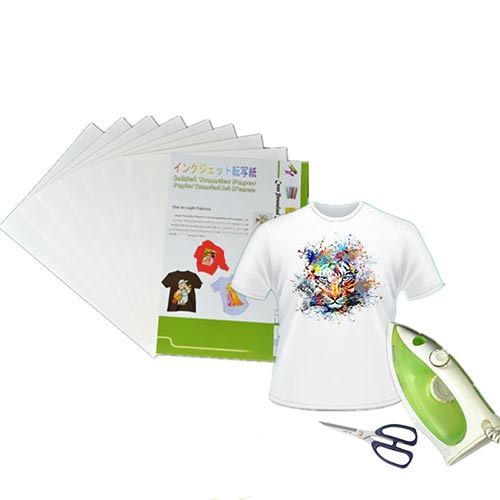
The iron-on transfer method for t-shirt printing is similar to heat press printing in every manner, only that instead of using a heat press machine here you’ll be using your hot iron to apply heat and pressure.
How it Works:
This technique is pretty simple. You start by working on a design on your computer and then printing it with an inkjet or laser printer on a heat transfer paper that’s made for use with the printer.
Now place the design on your t-shirt with the design side facing down and apply heat with your hot iron. Be sure to apply pressure as you press the iron on the design to improve the overall printing results.
Pros of Iron-on Transfer:
- cost-effective: the beauty of the iron-on transfer method is that it’s extremely affordable. You only need a standard printer, an iron, and some heat transfer papers to start printing your designs on t-shirts.
- user-friendly: this printing method is also incredibly easy to implement, even for an absolute beginner. the process is also less messy compared to screen printing as there are no dyes and solvents to deal with.
- ideal for detailed designs: despite being a cheap printing technique, you can use the iron-on transfer to work for simple to complex designs. It will produce good-quality images with vivid, full colors.
- works with multiple fabric types: whether you’re working on cotton or fabric shirts, or blends of these materials, this method will work quite well and produce fantastic results. The only exception here is heat-sensitive fabrics.
Cons of Iron-on Transfer:
- Works for small print runs only: using the iron on for bulk orders printing is not only costly but also time-consuming. That’s why we advise you to use this method for personal t-shirt printing at home and not for your business.
- Less durable prints: prints made using this transfer method also won’t last for long. They will easily fade with just a few washes. The more you wash your shirt, the faster the print deteriorates.
Who is it For:
This is an economical method and will work well if you’re doing t-shirt printing as a hobby at home. You don’t need to spend on a heat press. Assuming you already have a laser or inkjet printer in your home and a cloth iron, you’ll only need to invest in transfer papers to start printing t-shirts.
Final words
We’ve just covered it all! As you can see there are many t-shirt printing methods to choose from. Each method has its strengths and weaknesses. Whether you’re planning to print tees as a hobby or for business, you’ll get a method that works for you.
By taking into account the cost involved, quality of image, production time, and the material compatibility of each method, you should be able to easily settle on the most efficient printing method for your unique t-shirt printing needs and requirements.

