How To Make Transfer Paper For T-shirts?
Heat transfer papers are one of the most popular methods used for making customized t-shirts.
The method is cost-effective and at the same time easy to master, even for pure novices. This makes it suitable for those getting into a new hobby or setting up a new t-shirt printing business.
In this article, we’re going to discuss how you can make transfer paper for t-shirts and ultimately transfer your desired photo, text, or any other design onto your t-shirt.
This guide is beginner-friendly, so you should have no problems understanding each of the steps involved.
A Comprehensive Guide On How To Make Transfer Paper For T-shirts
Get ready as we delve into the key equipment needed and the whole process from printing onto a heat transfer paper and then using it to transfer an image on your garment.
What You’ll Need:
Directions:
Having gathered all the necessary equipment for this job, now it’s time to go! Follow these simple steps to start creating the transfer papers for your t-shirts.
Step 1. Come up with the Design
This whole process involves printing a design onto your t-shirt, so you first need to decide on which design you want to use.

If you’re just starting out, it’s wise to use already existing designs to help you save time and effort.
For business people, it is advisable to come up with your own creative designs to make your customized shirts look more unique and interesting to your customers.
Coming up with your own image from scratch on your computer is easy as you just need to install image editing software like Adobe Illustrator, CorelDraw, etc.
Step 2. Print the Design
Now you’ll need to print the design you just prepared in the previous step onto a heat transfer paper (HTF).
Assuming you have picked the right transfer paper (more on this coming up later in the post!), you shouldn’t have any issues printing your design onto it.
Before you press the print button, there are a few things you need to keep in mind to ensure everything goes as expected.

Tips for printing on transfer paper include:
- Print on the right side of the transfer paper: The non-coated side of the paper is the printable side of the paper. Got it? Manufacturers are now making it easy for you to easily know the right side to print by marking the non-printable side with grid lines.
- Mirror your design before printing on the HTTP: Unless you want your design to appear backward when you finally press it on the t-shirt, you should make sure you reverse it in printer settings before putting it on the transfer paper.
- Do a test print: A good way to ensure that you’re going to print the right thing is to make a test print on standard plain paper and see how your design comes out. In case you notice any mistakes, this is the time to rectify them.
After you print the design, remember to cut off the white parts of the paper that you don’t want to appear on your final print.
Step 3. Set up Your Heat Press Machine
At this point, you have the design on your transfer paper and all you need to do is transfer it to your t-shirt.
This is where the heat press machine comes in.
To prepare your heat press machine for heat transfer, you simply need to set up the transfer temperature, pressure, and timer. This will be pretty easy ad straightforward to do, depending on the machine you’re using.
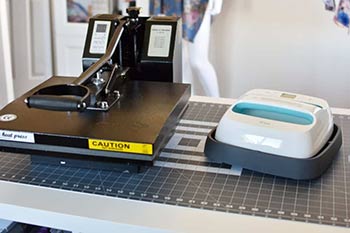
Start by turning the machine on. Set the temperature by turning the thermostat knob in a clockwise direction until you reach the recommended temperature setting (check the HTP instructions).
This will activate the heating light and once it goes, it means you have reached the desired temperature.
Next, set the pressure for transferring the design with the help of the pressure knob. Check the heat transfer pressure specifications. Thicker materials usually use more pressure for the best printing results. If not indicated, aim for medium to high-pressure settings depending on how thick your fabric looks.
Step 4. Load Your t-shirt into the Press
Place that t-shirt on your heat press machine. Make sure it lies on the flat platform straight as any folds or wrinkles will directly affect your print results.
If you think your shirt has too many wrinkles, you can pre-heat it on the heat press machine for about 5-10 seconds to make it straight. This is like ironing it!
You might also consider stretching your shirt when you put it on the press. This will ensure the print contracts slightly when you’re done and minimize its chances of cracking.
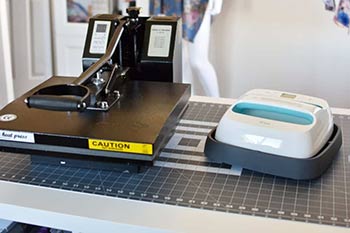
Make sure the side of the garment where the design goes is facing up. Try to align the t-shirt tag with the back of your press to enable you to print on the shirt correctly. Some presses also feature a laser grid onto your shirt to help you easily align your design.
Lastly, place your transfer paper carrying the design on top of the shirt, with the shiny side facing upward. in case of a heat transfer vinyl paper, pace it with the adhesive side facing down.
If your heat press doesn’t come with a protective silicone pad, you can simply place a thick cotton fabric or towel on top of your transfer paper to offer protection against burning.
Step 5. Press the Design onto The t-shirt
With everything correctly set up, it is time to transfer the design to the t-shirt.
Make sure the timer is set correctly to avoid overdoing the transfer or putting off the machine before the transfer is complete.
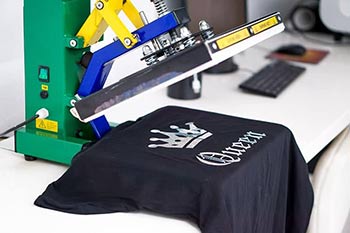
Pull down the handle until it locks, and the timer will start the countdown.
Once the timer goes off (most machines will produce a beep setting to let you know when the transfer time is over), open up your press machine and give it a few minutes to cool down before removing the transfer paper.
If you’re dealing with HTV paper, beware that peeling it off instantly will rip it off the fabric, so play patience until things cool down. The wait should be only a few minutes.
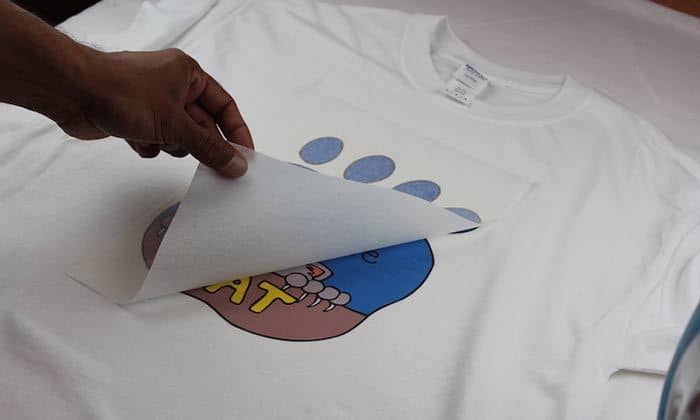
When it has cooled down, remove the shirt and carefully peel off the paper. behold, there lays a beautiful, vivid design on your t-shirt!
IMPORTANT: Don’t wash your shirt immediately after printing it. Wait for up to 24 hours to give the design enough time to settle. And when washing the shirt, be sure to turn it inside out first to minimize friction during cleaning that may affect the print. You should also keep off the harsh detergent and tumble dryers as they’re enemies of heat transfer prints.
Using iron to Transfer Your Design
If you don’t have the budget for a heat press machine, you can use your home iron to help you transfer your designs onto t-shirts.
However, this method should be used for hobby printing only and not for your t-shirt printing business.
The process is pretty similar to the one we have just discussed above, only that you’ll be using an iron in place of a heat press machine.
Here’s a quick guide on how to use iron-on transfer paper:
1. prepare the design to be printed on your shirt.
2. Print the design on the transfer paper correctly.
3. Weed out the unwanted parts of the transfer paper so that you’re left with the design that you’ll be transferring to the t-shirt surface.
4. Lay out your t-shirt on a solid, flat surface and smoothen it out with your iron if it looks wrinkly.
5. Put a piece of cardboard inside the shirt, right underneath the surface of the shirt you plan to print. This will help prevent the image from getting transferred onto both sides of the shirt.
6. Position the transfer paper on the shirt with the image side facing down on the shirt. Confirm that the design sits precisely where you want your image to go on the t-shirt surface.
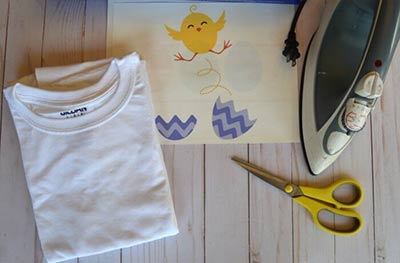
7. Set your iron to the hottest setting for effective transfer results. Then, iron the image by moving your ironing device in large circles on top of the transfer paper. initially focus on the outer parts of the design and gradually work your way towards the center of the design.
Make sure you consistently apply pressure as you iron and don’t put the iron in one place to avoid scorching the paper and bringing your image.
After ironing the design for around 3 minutes, turn off your Irion
Avoid using the steam setting as it will greatly hinder the transfer process.
8. Give the transfer time to cool. Don’t remove the paper right after ironing it on or you’ll mess up the image disastrously.
9. Finally, peel off the backing paper so that you’re left with the image. Be gentle when doing the peeling. Start at one of the corners of the papers for safe and easy peeling. And that’s it!
Use the same care instructions for iron-on transfer as for the heat press transferred designs.
Things to Keep in Mind when Using a Transfer Paper for T-shirts
When making transfer paper for t-shirts, there are some basics you need to know to ensure you do it correctly and achieve your desired results.
These basics will help you get the right transfer paper for the job at hand, which is key to fantastic transfer results.
Color of T-shirt You’re Printing on
Besides printer compatibility, different transfer papers are also designed to work with dark-colored or light-colored fabrics.
This consideration is crucial because the ink and tonner rely on white background for visibility and to deliver accurate color reproduction.
If you use the light-colored transfer paper on dark fabrics (dark background), the ink and toner will become translucent and hardly visible.
Before you get your transfer papers, you should ask yourself what color of t-shirt you’re be transferring your design onto. if you have light-colored, you should get transfer papers intended for use with light-colored shirts.
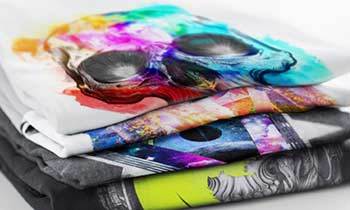
The transfer papers meant for dark fabrics come with white backing/coating underneath the print to facilitate accurate and vivid colors.
Transfer papers for light fabrics on the other hand only feature a clear transfer layer carrying your design to the garment.
The Design you’re Transferring
You should also keep in mind what type of design you’re planning to transfer to enable you to choose the right HTP for the job. We can divide the types of designs into main categories—photo and vector-based designs.
If you’re dealing with vector graphics—these include line, shape-based, and illustrations—then you won’t have any problems as you can use virtually any type of transfer paper.
For detailed, photo-based designs, however, you might be limited on which transfer paper you can use. You might want to lean on inkjet transfer papers more.
The inkjet printers are capable of printing a wide range of colors, so they’ll full you high-quality, realistic prints.
What Printer do You Have?
Printer compatibility is important when it comes to heat transfer papers. The special papers are designed to either work with laser printers or inkjet printers and aren’t cross-compatible.
Using inkjet transfer paper on a laser printer will end up damaging your printer.
With that said, you should always first check what type of printer you have to ensure you get the right transfer papers for the job. For an inkjet printer, get inkjet transfer papers.
And for a laser printer, go with laser transfer papers.
Final Word
Making heat transfer papers for t-shirts seems like a hard task, but it becomes pretty easy and straightforward when you get down to it.
This guide has just outlined the basic steps that you should follow when using a transfer paper and a heat press machine to transfer designs to t-shirts for the first time.
The additional tips and tricks we have shared will help ensure you do everything correctly and achieve stunning, high-quality results.

