How to Print Waterslide Decals for Tumblers, Mugs, and Glasses!
What if you could marble your coffee mug with your own words or an image sitting in your home? How cool it will be!
This is quite practical by using a wonderful craft medium: waterslide decal paper. Choose a design, print it on waterslide paper and put it on your glasses, mugs, and more. It's too simple, likewise.
But isn't it necessary to have a brief idea of what supplies you'll need as well as the steps and precautions? If so, keep reading to learn how to print waterslide decals for tumblers, mugs, and glasses!
What Are Waterslide Decals?
Before we start, let's introduce you to what a waterslide decal is. It's a decal that you can print, process, and apply to hard surfaces like tumblers, mugs, glasses, etc. As a result, a dull coffee mug can be transformed into a vibrant one.
Amazing! Right? This special paper works by soaking in water, hence its name. It comprises a thin film and backing slides. When the backing slides off, the adhesive dextrose on the back activates. Then, it's ready to be put on the surface!
Required Materials
You need the following equipment on hand to start this interesting craft:
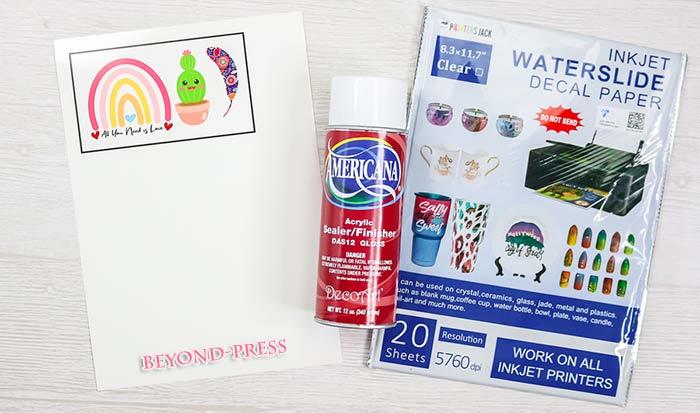
Waterslide paper:
Firstly, it comes in two variants -
- Transparent: best suits white or light-colored surfaces
- White: Can be used with dark surfaces
Also, it varies depending on which printer you use. Waterslide printable papers for inkjet printers and laser printers are separate types.
Printer:
- Inkjet: It's recommended to use an inkjet printer for waterslide decals as it offers better printing quality. However, to make the inkjet ink waterproof, you have to make an extra effort in the sealant process. So, you need an acrylic sealer too
- Laser: It's convenient when you want to skip sealing. Consequently, no more sealer is needed!
Cutting Instrument:
- Cricut machine: This digital machine provides a professional and faster cut.
- Scissors: The simpler alternative is to use a scissor. However, if you claim to be a craftsman, you can't deny the importance of a Cricut.
Other Instruments:
- Rubbing alcohol: To clean the hard surface where you'll apply
Paper towel
A bowl of water: To soak the waterslide paper - Mugs, glasses, tumblers, (the surface where you want to put the awesome print)
- Design: Which do you want to put on a surface? You can make your own or buy one online.
Steps to Print Waterslide Decals for Tumblers, Mugs, and Glasses
Aren't you excited about creating a masterpiece? Here we go. We are going to show you how to create this fantastic art!
1. Make the Design You Want to Print and Customize its Size.
The first step talks about the design or image you want to print. You can buy it from online stores or create your own.
Second, size the image. Now, pay attention to the size of the surface where you will put it. Usually, 2 to 3 inches in height is compatible with small-sized mugs and wine glasses.

Tips: Head to Cricut Design Space, You might find it useful for creating a decal design.
2. Print the Image:
After you have successfully created a design, it's time to convert this soft copy into a waterslide decal paper. So,
- Connect the printer
- Place the waterslide decal paper correctly.
- Make sure you're printing on the glossy side of the paper. (Some brands specify which side is back and which is front.)
- On-screen, choose the printing "best quality" and "glossy paper" options.
- You can print from within Cricut Design Space or any other image editor you're using.
Tips: Waterslide decal papers are expensive. So, don't waste paper. You can cover the entire paper with decals. It saves some money!
3. Seal Your Waterslide Decal.
This step is only for inkjet printer users. If you have a laser printer, you may skip this section.
Let the paper dry for 5–10 minutes before you start this step. Don't touch it now!
- Choose a well-ventilated space
- Start by spraying acrylic sealer over the entire surface
- Spray once, wait 30 minutes, then spray another coat. Repeat this 3 times
- Once you're done, your sheet will have three acrylic sealers over it।
Tips: We prefer to spray three distinct coats in three directions. For example, spray first, let it dry, turn the paper over, and spray the next coat.
4. Cut the Waterslide Decal Paper
In this step, you can use ordinary scissors to trim around the images.
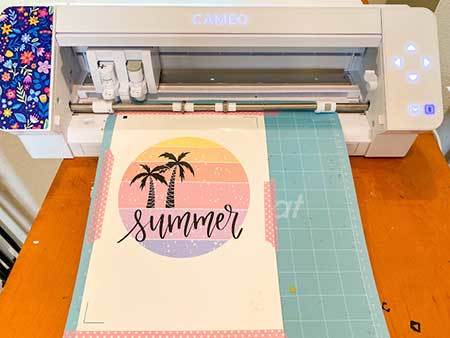
However, a Cricut machine can make this step a bit easier and more precise.
If you're using it, here's how to do-
- Go to Cricut Design Space
- Click to Browse All Materials
- Medium Cardstock is best to cut these types of papers.
- Set the pressure higher.
- Put the decal on the cutting mat.
- Load it onto the Cricut

Tips: First, do a test cut to check whether it cuts all the way through or makes an error.
5. Prepare the Mug, Glass, or Tumbler Surface (Where You Want to Put it)
Now, clean the empty surface. Use rubbing alcohol for better performance. Then, wipe with a paper towel or clean cloth.
6. Soak the Decal in Water for a Few Minutes
Get a bowl of water large enough to accommodate the decal. Submerge the waterslide decal in water for 30-60 seconds. It will curl up slightly, which isn't an issue.
7. Wet the Surface
Use a paintbrush or try with just your fingers alone. Make sure the surface is not dry. It will help to move the paper easily.
8. Remove the Decal from The Water and Apply the Image to the Surface
It's the final game! Now, put the waterslide decal in position approximately. Then, slide the decal off the backing. You may notice that it has already been separated slightly.
It is easier to hold the mug with the left hand and slide the backing paper out with the index and thumb fingers of the opposite hand.
Make sure it is in the correct location. If not, move it to the exact position where you want. (It slides easily as everything is wet.)
9. Remove Bubbles and Wrinkles and Allow the Decal to Dry
At this point, your responsibility is to remove any bubbles or wrinkles by pushing them. Gently press with your fingers. Otherwise, use paintbrushes.
Afterwards, use a paper towel to push the water out and let it dry for at least three hours.
Tips: We recommend starting this step from the middle and ending at the edges.
10. Set or Seal your Waterslide Decal
The last step is to set (if it's a mug or glass) or to seal (for a tumbler).
To set decals for glasses and ceramics, you had better follow the directions printed on the waterslide paper you used. Usually, it needs baking in an oven for 10–15 minutes.

Another coat of epoxy should be applied to seal tumblers.
Bravo! You nailed it!
But, have patience for 2 or 3 days more. So, colors don't fade off quickly.
Guess what's next? Enjoy your coffee on your handmade craft!
Precautions
Waterslide decals aren't dishwasher safe:
Unfortunately, this amazing piece of art will be destroyed if you clean it in the dishwasher. You can hand wash these and have a powerful effect on their longevity!
Still, sturdy crafts can be made that withstand the vigorous cycles of the dishwasher. Try dishwasher-safe Mod Podge if you're using a mug. For a tumbler, you can simply epoxy the outside and make it as robust as a dishwasher safe.
Food safe or not?
It's a little bit uncertain yet. The product manual didn't mention anything to prove that these crafts are food safe. In fact, a product has to go through a rigorous certification process to claim this tag. However, they may not contain any toxic substances.
As a precaution, keep a half-inch space between the design and the ceiling. Your lips won't touch the decal, and you're safe!
You reached here because you fell in love with the waterslide decal project. So, don't procrastinate your time to create this mind-blowing masterwork. When you forget any point, scroll through this step-by-step guide on how to print waterslide decals for tumblers, mugs, and glasses!
Still, if you're hesitating that you might make an error, listen to this quote:
"In crafting, there are no mistakes, just unique creations."

