How To Laminate Paper At Home Without A Machine
Lamination is a great way to preserve your important documents and favorite photographs. It is like adding a stronger outer layer to your document that’s resistant to getting wet, torn, or catching dirt.
That said, you don’t always need a laminator machine to laminate your documents. If you don’t have access to this machine or don’t have a budget for one, you can still laminate your papers at home without a machine.
Read on to discover some easy DIY methods you can use to easily laminate your papers without investing in a laminating machine.
4 Easy Methods to Laminate Paper at Home Without a Machine:
These are the four most popular methods for laminating paper without necessarily investing in a laminating machine.
All the methods are pretty inexpensive as they don’t require you to spend on any expensive pieces of equipment.
1. How to Laminate Papers Using Self-laminating Sheets
Self-laminating sheets also go by the name self-adhesive sheets and their name will easily tell you why they’re a good way to laminate your paper without using a laminator machine.
These sheets are not only cheap but also readily available. You can get them from your local stationary shop.
We advise you to get sheets with grid on the rear side because they help guide you on how to properly position the documents you’re laminating, making the whole process smooth and fast for you.
Instructions:
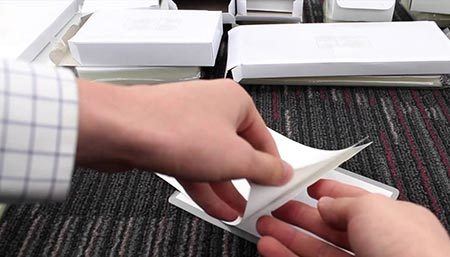
Step 1. Grab a sheet and separate it from its backing. Be careful when doing this since it can get challenging. Try using your nails to make this step easy. And avoid touching the adhesive part of the sheet, else you might leave your fingerprint in there.
Step 2. Place the document/photo to be laminated on the side of the sheet with adhesive and adjust it so that it sits well in position (grids will guide you in this step). Ensure the boarder all around the document appears uniform.
Step 3. With the paper properly seated in place, grab another sheet, remove tis backing and place it over the paper so that your document now lies between two sheets. Adjust the upper adhesive sheet so that it is in line with the lower sheet.
Step 4. Smoothen out the two sheets with your hands and ensure you don’t leave any air bubbles behind as these can easily form wrinkles and make your DY laminates look bad. And you’re done!
2. Using Laminator Pouches
The laminator pouches, also referred to as syndetic paper pouches, feel like the ordinary paper when you touch them. They’re readily available from your local stationary shop and are another great DIY lamination technique.
The laminating pouches are usually designed to work with a laminating machine. But in this case, we’re assuming you don’t have a machine, so we’ll show you how to use them without a machine.
Instructions:
Step 1: Open the laminator pouch and slide the document you want to protect inside. Make sure you properly position it in the middle of your pouch and try to leave equal distance around the edges.
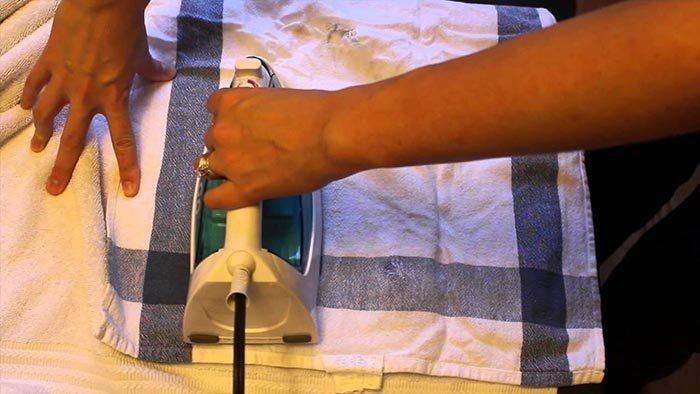
Step 2: Now place the pouch containing the document on a flat, solid surface such as a table and cover it with a thin towel to act as a protective barrier when ironing the pouch in the next step.
Step 3: Grab your home iron set and set it to Medium heat setting. Iron the area of the area sitting directly above the pouch for approx. 30 seconds. The heat and pressure applied using the iron will help melt the heat-sensitive adhesive and stuck the two layers of pouch together firmly.
Step 4: Lastly, remove the protective piece of towel to expose the now laminated document. Leave it for some minutes to cool off and set in completely to ensure a more durable laminate.
Step 5: Take one last look at your newly laminated document. If you notice any lose parts, pass iron over it using the above procedure.
3. Laminate Papers with Clear Packing Tape
Yes, you can also count on the transparent packaging to easily laminate your paper. This tape is easy to find and comes with a single layer with one adhesive side—making it the perfect candidate for this job.
Keep in mind, however, that this method is best suited for laminating little pieces of papers and not those large A4 documents.
If you’re planning to laminate bookmarks, name tags, business cards, labels, and other similar sized documents, this is the technique to use.
Instructions:
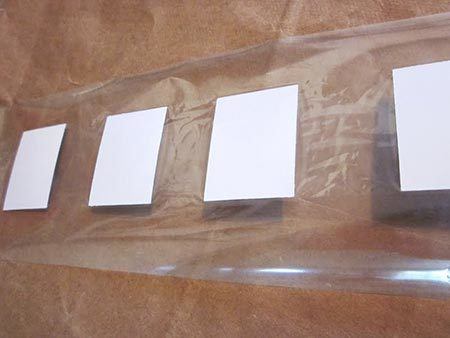
Step 1: The first you need to do is roll out some of the clear tape and place the paper to be laminated om the adhesive side of the tape.
Step 2: Finely adjust the paper so that it accurately sits in the middle of the tape and laves some allowance of around ½-inch from the tape end.
Step 3: With the paper in place, measure the length of the tape similar to the size of your paper. Measure this distance from end of the paper. Mark the tape and proceed to cut with a sharp pair of scissors or a paper trimmer.
Step 4: Now folds the free tape length over the paper such that your paper now becomes sandwiched between two layers of the clear tape. If you want, you can skip the measuring and cutting part and simply fold the tape and do the cutting later.
Step 5: Smoothen out the tape on the paper to eliminate any air bubbles that might affect the adhesiveness effect of the tape.
Step 6: Finish off by cutting the tape at edges so that they appear almost in line with the paper edges. Or you can decide the distance (allowance) you feel comfortable with.
4. How to laminate with a ziplock bag
If you have some unused ziplock bags lying in your home, you can also use them to laminate stuff in your home.
Ziplock bags are pretty strong and durable, making them a perfect layer for protecting your document against undesired elements.
This process is also super-easy DIY and you only need a ziplock, tape, and a pair of scissors.
Instructions:
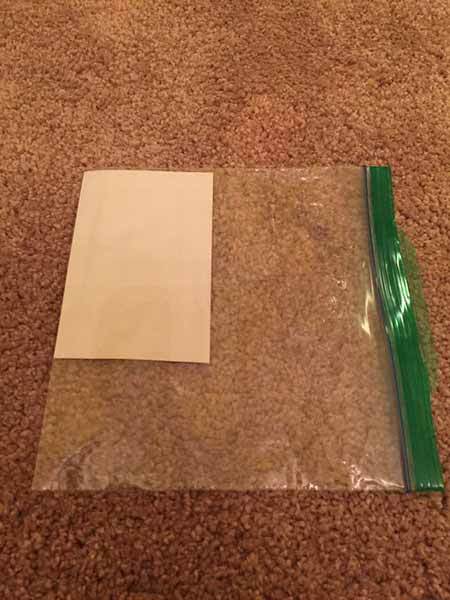
Step 1: Grab that unused, NEW ziplock bag and open it. Slide in the paper or document you want to laminate into a corner of the bag.
Step 2: Next, use the scissors to cut the paper out with the plastic bag.
Step 3: Fold the paper inside and tape the open edges you just cut to seal it completely. That’s it! You now have a ziplock bag laminated document!
Frequently Asked Questions
Can You Laminate at Home Without a Machine?
Yes, you can laminate documents without a laminator.
How do You Laminate Paper With an Iron?
Laminating paper with an iron is a very easy process that most people can do at home. It usually takes less than 10 minutes.
The first step is to spray a small amount of “laminating spray” on the paper being laminated. Don’t use too much or it will drip off the edges and become difficult to work with.
Why do I have to laminate my documents?
There are many reasons for laminating your documents. One reason is to prevent ink from smudging or rubbing off on other surfaces. Another reason is that the laminate prevents documents from being torn, wrinkled, or water damaged.
Can you laminate with a straightener?
Yes. You have to use your iron on its hottest settings. Place the laminating pouch on a hard surface. Put a cotton pillowcase over the top and iron until the pouch seals. You are done
Conclusion
There you have it! The 4 highly effective techniques for laminating and preserving your important documents, favorite photos, and other papers at home without a laminator.
As you have seen from our discussion above, all these methods are super-affordable and will save you a fortune compared to the amount of cash you might need to spend if you decide to get a new laminating machine.
Some of these methods even make use of already available items in your home like the transparent packaging tape.
So, which of these DIY lamination techniques would you want to try first?


