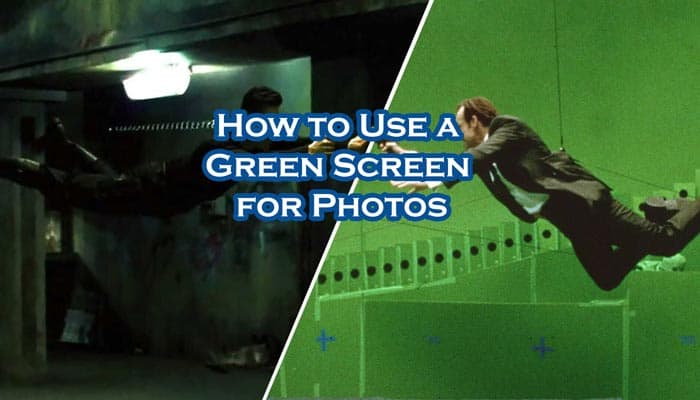
How to Use a Green Screen for Photos?
A green screen is a great way to take your photos to the next level. By using a green screen, you can easily add in special effects or change the background of your photo.
- Choose a location for your green screen
- It should be a well-lit area with plenty of space around it
- Hang the green screen material on a wall or frame using clips or other fasteners
- Make sure there are no wrinkles in the fabric
- Place your subject in front of the green screen and have them pose for the photo
- Take the photo using your camera’s flash to ensure that the green screen is evenly lit
- Open the photo in editing software and use the “chroma key” tool to remove the green background and replace it with another image or color
Green Screen Photography for Beginners
Can You Use a Green Screen for Still Photos?
Yes, you can use a green screen for still photos. This is because a green screen allows you to chroma key out the background of an image so that you can replace it with another image. This is useful for still photos because it allows you to change the background of an image without having to physically move the subjects in the foreground.
How Do You Put a Picture on a Green Screen?
To put a picture on a green screen, you need to use chroma key compositing. This is a process where you take two images – one of which is the background image that you want to superimpose your subject onto – and combine them using color information. The most important part of this process is making sure that your green screen is evenly lit and there are no shadows cast onto it.
If there are any shadows, they will show up in the final composite image. Once you have an evenly lit green screen, you can shoot your subject against it. In post-production, you’ll then use chroma key software to select the green pixels in your image and remove them.
This will leave only your subject, which can then be superimposed onto the background image of your choice.
How Do You Use a Green Screen for Beginners?
When it comes to using a green screen for beginners, the process is actually quite simple. First, you will need to find a green screen that is large enough to fit your needs. Once you have found a green screen, you will need to set it up in a well-lit area.
Next, you will need to position yourself in front of the green screen and make sure that there is no movement behind you. Finally, you will need to take a picture or video in front of the green screen.
How Do You Use Green Screen on Iphone Photos?
If you want to add a special effect to your iPhone photos, you can use green screen. Green screen is a technique that allows you to superimpose one image over another. For example, you could take a picture of yourself in front of a green screen and then add an image of the Eiffel Tower behind you.
To use green screen on your iPhone, you’ll need an app that supports the feature. There are several apps available that offer green screen functionality, but we recommend using Green Screen by Apptly LLC. This app is available for free on the App Store.
Once you’ve installed the app, open it and tap the “Choose Photo” button. Select the photo that you want to edit from your camera roll. Then tap the “Edit” button in the bottom-right corner of the screen.

Tap the “Green Screen” tool at the bottom of the editing interface. You’ll see a preview of how your photo will look with different background images. To select a background, tap on it and then tap the “Use Background” button in the top-right corner of the screen.
How to Put Picture on Green Screen Capcut
Hello everyone, today I’m going to show you how to put a picture on a green screen using the Capcut app. This is a really cool feature that can be used for various purposes, such as creating video backgrounds or simply adding an image to your video. Here’s how it works:
1. First, open the Capcut app and select the video you want to edit.
2. Then, tap on the “Effects” icon at the bottom of the screen.
3. Next, select the “Green Screen” effect from the list of options.
4. Now, choose the image you want to use as your green screen background by tapping on the “Select Photo” button.
5. Finally, tap on the “Apply” button and your image will be applied to the green screen!
Conclusion
A green screen is a great way to take photos and add a little bit of fun to them. Here are some tips on how to use a green screen for photos:
1. Choose a location that has good lighting. The green screen will reflect light, so you want to make sure that the area you’re using is well-lit.
2. Set up your green screen in front of a plain background. This will help the editing process later on.
3. Take your photo! Make sure that everyone in the photo is close to the green screen so that they’ll be properly edited later.
4. Edit your photo using software that allows you to chroma key out the green screen.

