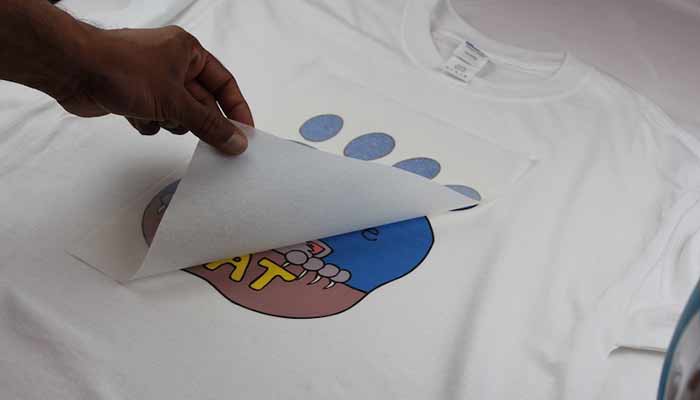
How To Print on T-shirt Transfer Paper: Step By Step Guide
Printing on transfer paper becomes easy if you know what you’re doing. We have provided you with all the equipment you need to arm yourself with and the instructions on how to print on a t-shirt paper below.
Requirements for printing on transfer paper:
- Inkjet printer
- transfer papers
- design
- plain paper
Step 1. Decide on the Right type of Transfer Paper
The first and most crucial step is to get the right transfer paper for the job. Many aspects come into play when choosing the right type of transfer paper for your project.
We’ll try to summarize the most important factors below.
- Light vs dark-colored transfer papers: the transfers are also available in two main types (dark and light) depending on the color of garment you’ll be printing on. The light paper is suitable for light-colored fabrics while the dark paper will give you the best results when printing on t-shirts with a darker shade.
- Printer compatibility: make sure you choose transfer papers that are compatible with your specific printer. Though these papers are mostly made for use with inkjet printers, some models can work with laser printers as well. Only use your transfer paper with the recommended type of printer. Otherwise, you risk damaging your printer for good.
- Size of paper: the heat transfer papers come in a range of sizes to suit different user needs. The most common size if 8.5 by 11 inches and is the size of a letter paper sheet. You need to make sure you get a paper that can easily fit in your printer.
- size of the project: you should also make sure the paper size you pick is suitable for your project size. For instance, you’ll need a smaller paper for printing a design for kids’ t-shirts compared to an extra-large adults’ shirt.
- Quality: the perfect transfer paper should also be able to produce high-quality prints that last for a long time. papers with a high level of elasticity will help keep your design from cracking or peeling when you finally print it on the shirt.
It is recommending that you buy the papers in batches to help you save time. Having spare transfer papers is also helpful just in case you make a mistake with the first one.
Step 2. Get your Design Ready
Next, you want to prepare the graphic you want to print on the transfer paper. You can select a design or photo on your computer or you can come up with your own design.
Whatever path you choose, you’ll be pleased to know that the heat transfer printing method doesn’t restrict you on what designs you can use, whether it’s simple letter and number designs to complicated photography-based designs.
If you’re just starting out, however, it’s best to start with something simple. You can select an already existing design to save you the time need to work on a new design from scratch.
Once you have edited your design and it looks just as you’d want it to appear on your t-shirt, it is ready for printing.
Step 3. Make a Test Print
Now that your design is ready for printing, it’s time to feed it into the printer. You’ll need to set the print settings on your computer.
You should use the same settings you use for standard printing paper: set to normal quality, plain paper. Print image. The text may vary depending on the printer brand you’re using.
DON’T forget to mirror/flip your image before printing unless the transfer paper instructions state otherwise. If you don’t mirror, your image will be printed backward on the shirt. Pretty awful, right?
BEFORE you feed the actual transfer paper into your inkjet printer, insert a regular plain paper and press the print button. This step is important to ensure that your design look accurate and just as you want it to appear on your t-shirt.
Step 4. Print on the Transfer Paper
Confirm that your print settings are correct and that you have correctly fed the transfer paper into the computer before pressing the print button.
Feed your transfer paper in such a way that the printer prints on the non-glossy or unlined side of the paper. Most manufacturers usually mark the side which shouldn’t be printed to make it easy for you to print on the paper.
Finally, press the print button!
If you want to print multiple transfer papers, you should ensure you feed one paper at a time.
Unlike regular printing, you can feed multiple transfer papers to your inkjet at a go. The rule is one transfer paper at a time!
Step 5. Weed out your Design
Now that you have your design printed on the transfer, you need to cut out the excess parts (i.e., the white, unprinted parts of the paper that you don’t want to appear on your final print on the shirt).
A pair of sharp scissors or a craft knife will come in handy for this part.
Also, give the printed design time to dry up (this takes a few minutes depending on the paper you’re using) before you transfer it to the fabric surface.
Do you need Special ink for T-shirt Transfer Paper?
When printing on heat transfer paper, you might also want to know the best ink to use in your printer to ensure you achieve high-quality, long-lasting prints on your t-shirts.
The truth about transfer papers is that they’re designed to work with inkjet printers and you can achieve great results without having to modify your printer in any way. Whether you use compatible inks or OEM inks, the results will be pretty much similar.
The secret to achieving great results here lies in the transfer paper and not the ink you use. if you use your t-shirt transfer paper correctly (as per the manufacturer's instructions), you’ll be able to transfer high-quality, vivid, and durable prints.
However, the pigmented inks might have an edge over dye-based inks in that they’re more stable and durable, even when exposed to direct sunlight.
If you think that you need to personalize your t-shirts with UV-resistant designs, then you should consider using this specific type of ink for your project.
Final Verdict
See, printing on a t-shirt transfer paper isn’t rocket science! In this guide, we have just discussed the key steps to follow to ensure you correctly printer on your transfer paper.
The first and most important step is to ensure you have the right transfer paper for your project, have your design ready, use the correct printer settings, and feed your paper to the printer correctly. Remember to make a test print to ensure your image is accurate.
For the best printing results, make sure you consult the user instructions for the specific transfer paper you’re using.